|
|
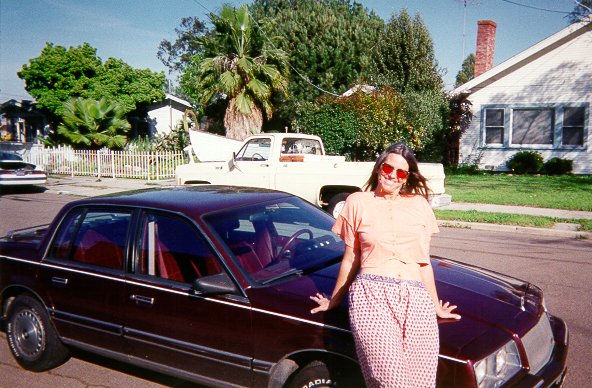
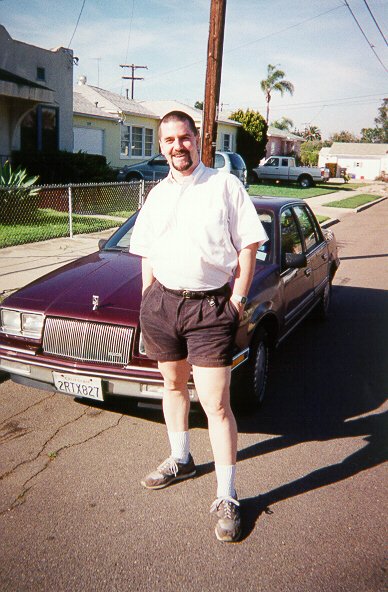
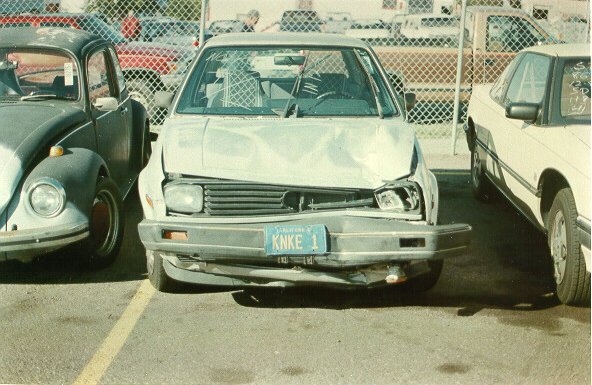
| Well, after I totaled my last car on a night drenched by an El Nino rain, I needed new wheels. At first I drove a car that a friend loaned me. This friend, Jan Hansen, really came through for me with this spare set of wheels. While it worked it was not the type of car either of us would want gracing our driveways. In short it was a Buick Skylark. | |||||||||||||||||
So, I bought a pickup truck!
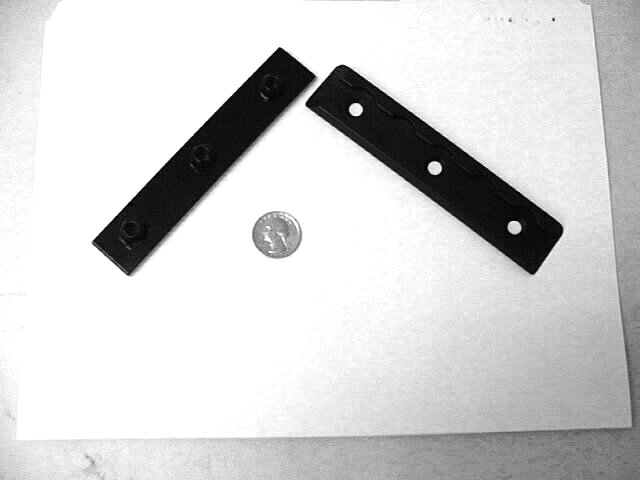
This fine machine that is gracing my driveway is a 1996 Ford Ranger XLT Supercab. It is the four cylinder, two wheel drive version. I did not opt for the more powerful V-6 as it would have added too much to the cost. Nor did I really want a four wheel drive machine as I have no plans for offloading with this truck. I have been driving my new toy for several years now and I really like it. The seating position in the cab is a real step up from when I was in my VW Golf. Now I can see much more of the traffic in front of me and that has made driving much better. I also like the utility of this utility vehicle. I was always cramming things into my Golf and although it could hold an amazing amount of stuff, it really doesn't hold a candle to what this pickup takes in stride. To assist in this hauling I decided to install some tie-downs in the bed of the truck. As this is my truck, not just any tie-down would do. Oh no! These had to be special. The ones I settled on are ProTracks made by Eagle Co. in Temecula CA. They are well made and offer a good degree of flexibility in attachments. The one thing about them though, was that they required using bolts for the most secure placement of the tie-down tracks. This was a problem as I have full bedliner on the truck and did not want to cut big holes in it. A friend of mine, Joel Vande
Berg, solved this by suggesting I work up an attachment plate to hold
the nuts in place once I had drilled the holes for the tracks. To
have these attachment plates made however, I would have to have them
fabricated. Just my luck that my boss's son is a metal worker
here in town. I discussed this with him and we settled on the
spec's. Here is what he came up with.
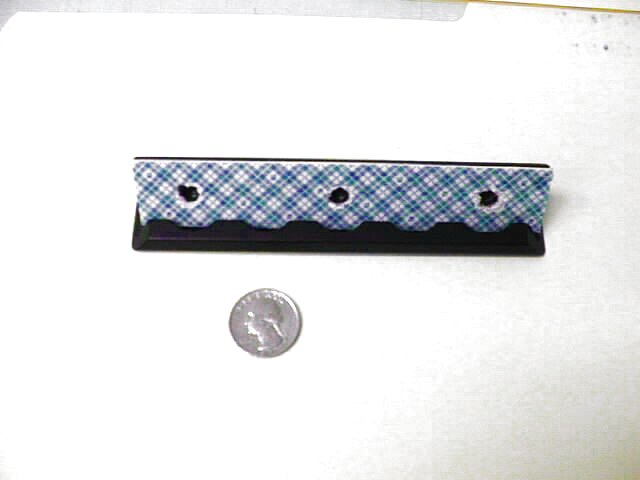
One thing I did learn from trying
to install these things in my truck bed was that I should stick to my
day job! I am pretty good with tools and have made a number of
things out of wood. This was the first time I had done much work
with metal. I learned, the hard way, that metal work requires a
different approach. After much sweating and frustration I learned
that being off by even the smallest amount could really mess things
up. I am used to working with tolerances of no more than a
sixteenth of an inch. For metal work, even work so simple as
this, that was too much slop. Alan was real helpful with
this and we got done what needed to be done. As a result, I now
have the tie-downs I wanted and things are great!
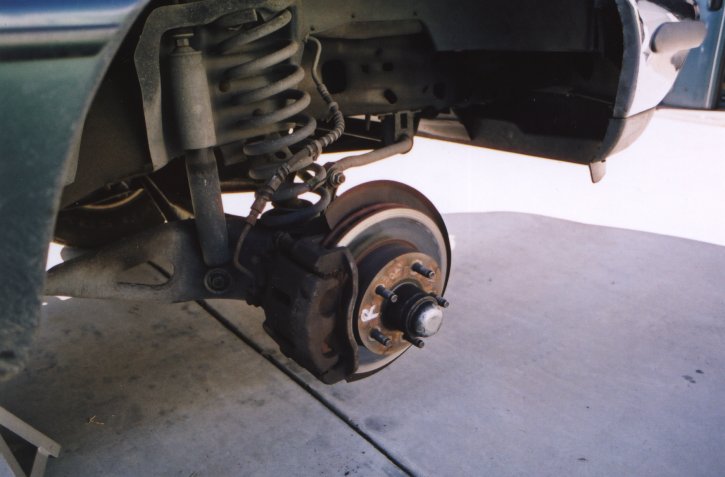
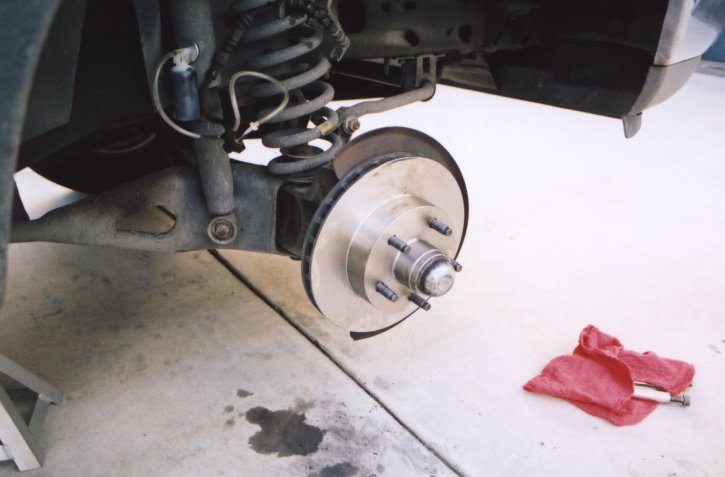
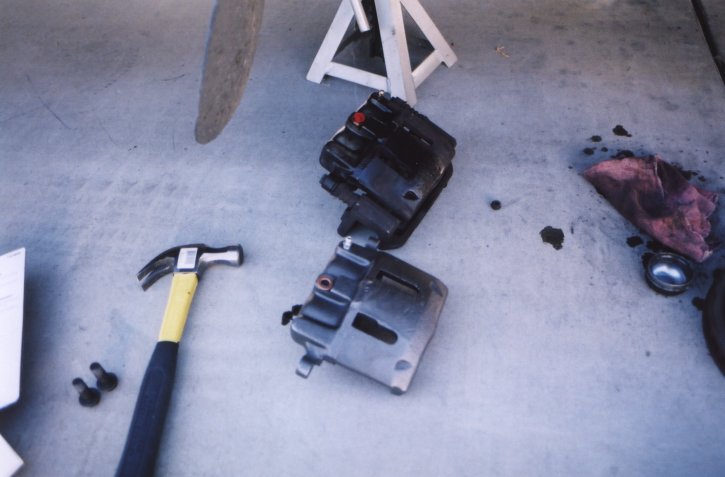
This shot above is what the new
rotor looked like when I finally had it mounted. Placing the
caliper onto that assembly was pretty direct. I had to replace
the rotors on both sides so that the braking action would be equal on
both sides. That was necessary but a pain. That clear hose
and bottle hanging off the side of the shock absorber there is the
brake fluid I drained from the system and caliper in order to pry the
brake loose on that side. A messy thing this. The stain in
the concrete there is from what dribbled out before I got it plugged. |
|||||||||||||||||
| This was an interesting
experience for me but also a real pain. By ignoring one of the
basic systems of my vehicle I managed to set myself back by about
$300. New brake pads only cost about $20 a set. So,
checking the state of the brake pads is now another thing on my regular
to do lists. |
|||||||||||||||||
| The Leaky Cab | |||||||||||||||||
| By
2016 I began noticing that the headliner in the truck would get wet
after my truck had been through any rain or even a car wash. This
was much more noticeable toward the rear window of the cab. At
first I thought it might be water leaking in through the backup light
mounted to the rear of the cab roof. So, I looked it up and
bought a new seal ring for it. The replacement was quite simple.
First I gently unscrewed the light unit from the back of the truck cab. The whole assembly is made out of plastic and I didn't want to crack it by torquing the screws holding it in place. It took a little wiggling to unadhere the seal around the unit's edge but it was easily enough done. Then I used car in disconnecting the light bulbs from the unit. That plastic can get brittle with age and the tabs holding the bulbs in place can snap if you're not careful. That safely removed I set about removing the old seal ring from the unit.  It came out quite cleanly. Then came some cleanup of it and I next inserted the replacement seal.  Here I've got the lighting unit with its new seal inserted and properly adhered to the unit. I then carefully reinserted the lights into their respective positions and then carefully fed it all back into the cab. 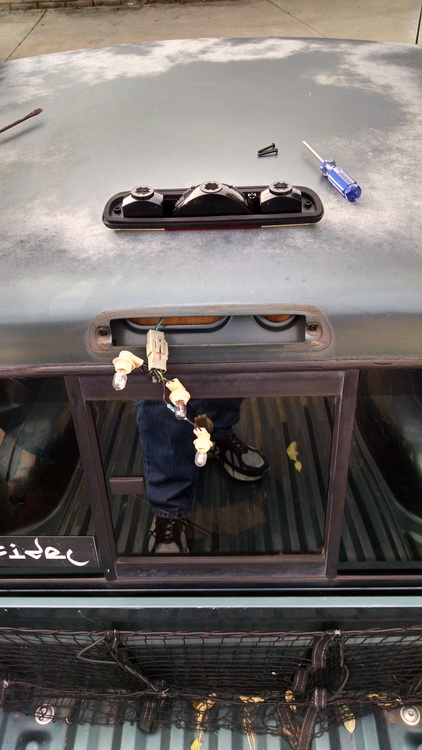 At that point the replacement was ready to go back on to my truck. 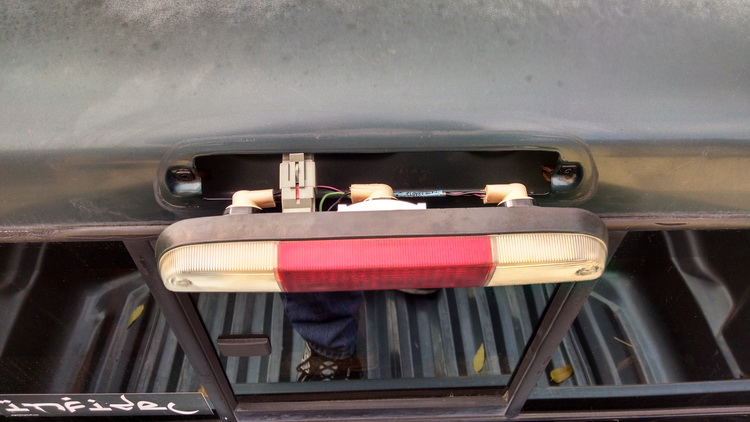 Again, I had to take care not to torque the screws too tightly lest I crack the plastic. I snugged things into place, pushing the wires ahead of the unit as I pressed it home. Just a little care applied and everything fit back nicely. 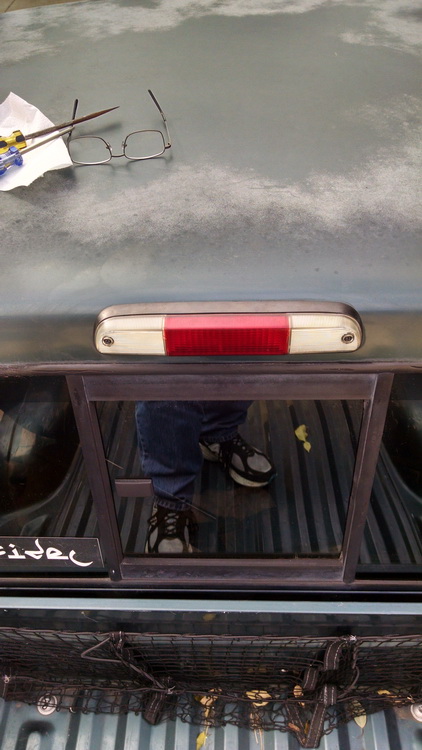 And it was all over and one. I figured getting twenty years out of this seal was pretty good, all in all. The replacement was a simple thing and involved no special tools. I found the replacement seal online and it was a cheap enough replacement part. Unfortunately, it didn't solve the problem. The headliner was still getting wet when it rained and such. And the truck cab would smell like wet carpet for days afterward as it dried. So, one fine day in September 2016 I decided to replace the seal around the rear window itself. This was a much more involved effort. Looking up the task on the various online Ranger Forums, the guys there advised that to make things practicable, I should remove the seats entirely first. In hindsight, they were right. I thought that I'd save myself the time and effort by leaving the seats in place. I did save the time and effort of removing and replacing the seats but in the interim I had to put up with a very cramped and difficult space to work in. That work inside the cab consisted of removing the interior trim pieces that were covering the various bolts that held the rear window in place. The rear window of the cab comes as a single unit. And it's attached to the cab by some several bolts around its circumference. Those bolts are covered by the decorative trim panels. And those panels are held in place by the automotive industry's standard "snap rivets." I really hate those things. They're a single use fastener that is also precious hard to remove without gouging the trim piece it's holding in place. Even with the specialized lifting / removal tool the damn rivets often tore apart rather than come out and / or left me carving into the trim pieces as I was popping the damn things out. Plus, getting replacement rivets that were of the right size and match in color as also a pain. Eventually though, I got all the trim pieces out of the way and found all the several bolts that needed to by loosened. The bolts themselves are permanently attached to the rear window framing so it's only the nuts on the inside of the cab which needed to be removed. That done, I then gently pried the window unit off of the truck cab. The assembly is a pretty stout thing but the last thing I wanted to do was break it at this point. In this image I've already got the window assembly removed and you can see the old seal hanging down a bit. I'd stuffed my truck blanket in between the gap of the bed and truck cab as a precaution. I didn't know how unwieldy the window unit was going to be and I didn't want to risk it slipping from my grip as I worked on it and it then sliding down between the cab and bed. Turns out I was over cautious but that was alright. You can also see where I unbolted the latches for the rear side windows. Those had to be undone to remove and loosen the trim panels underneath them in order to get at the window bolts. 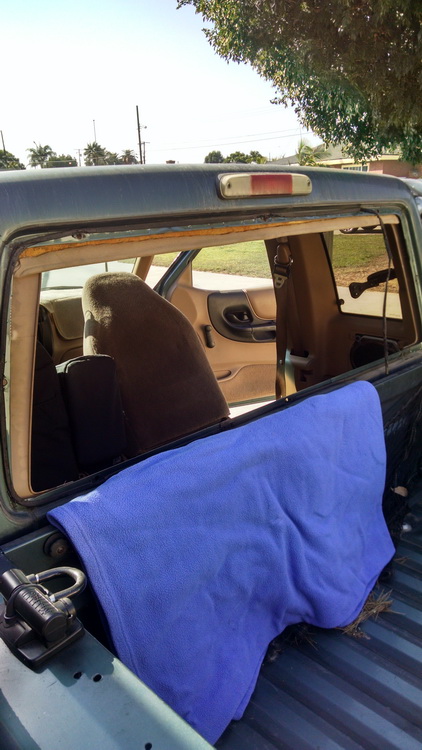 Here's the rear window unit. As I said, it's a pretty stout piece. You can see bolts projecting around its circumference. 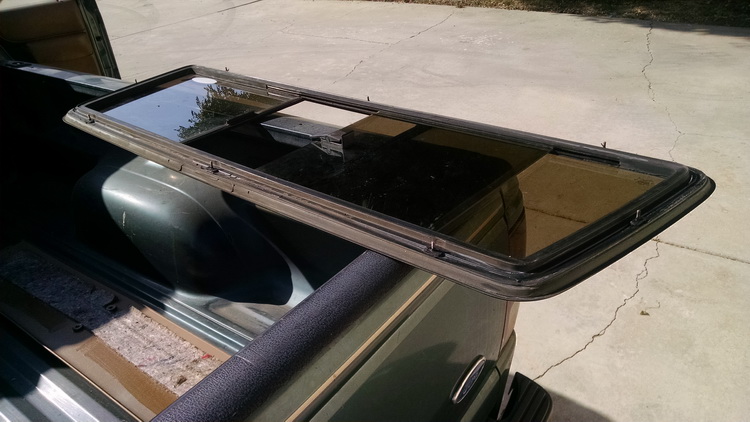 Here's another view of the unit from a different angle. 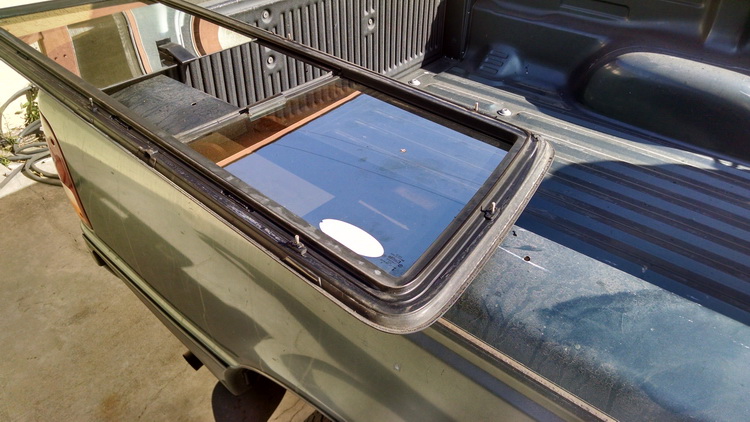 The window seal material really wasn't sticking to the material of the window unit. Instead, it very much stuck to the metal of the truck cab. Getting the old sealant material off was a pain. Some of it had clearly degraded over the years and was almost dry and brittle. I figure that's where the water was getting through as it was located along the top of the window sill. The rest of the stuff was still very much flexible and sticky like a long rope of tar. 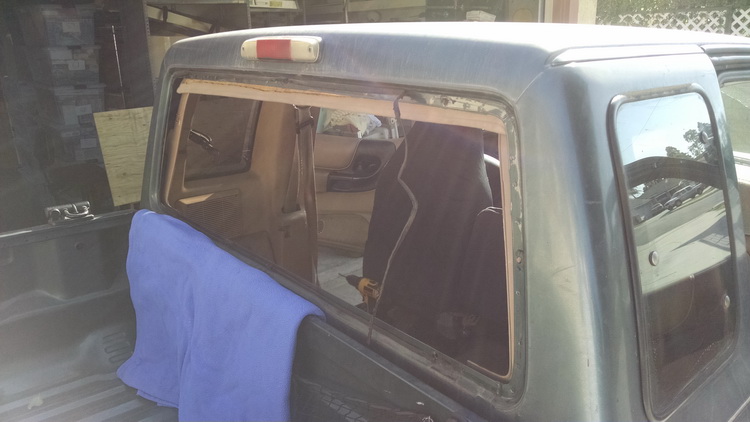 I tried removing this stuff like pulling up chewing gum. It had much the same consistency and stickiness. I used a plastic scrapper to help things along. I didn't want to use a metal one lest I end up scratching into the paint as I did so. I used paint thinner to remove the last of the bits of sealant material and to ensure a nice clean surface for the new stuff. As per the discussions on the forums, I went out and bought a package of 3M "Window-Weld" round ribbon sealer. The stuff is sticky as all get out but pretty workable. For my rear window I went with the fifteen feet package but used just a bit more than half. I pressed the ribbon on to the circumference of the window assembly rather than place it on to the truck's window opening. This way I was sure not to obscure the bolts and such. I don't have any further pictures of this project as it proceeded pretty directly once I'd gotten the new ribbon sealer attached to the window unit. I then got the unit lined up properly and pressed it home. The ribbon sealer adhered both the window unit and the truck cab but didn't waste any time getting the nuts back on to the window unit bolts and tightening things down. There was some back and forth where I made sure to press the window unit firmly onto the truck cab and progressively dog down the bolts on the inside. But in just a few minutes it was all over said and done. Then came the laborious process of reattaching the trim pieces and then replacing everything inside the cab that I'd removed to open the space up for my work. All in all, it was a couple of hours worth of work on a weekend day's afternoon. The reward however, was to once again have a nice and water tight truck cab! After I got the cab squared away and had given the sealer some time to properly be in place, I took my truck down to a local car wash and ran her through. I kept running my hand along the headliner at the upper rear of the truck cab. Previously, this is where it'd be soggy wet from water leaking through. This time it remained nicely bone dry! Yay me! It worked! This was a simple fix if a bit of a pain in the ass to get done. Not having a leaky cab that smelled like wet carpet was worth it however! | |||||||||||||||||
| The Road's End | |||||||||||||||||
Well, this didn't go as planned... 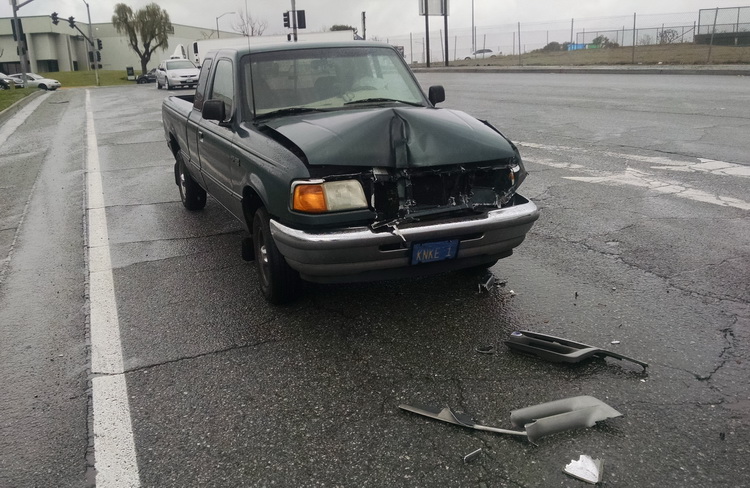 Friday, March 2nd, 2018 I learned how effective the steering wheel airbag was on my truck. After twenty years of service my truck is now well and truly done. The only injuries I sustained were from that airbag's deployment. There was some minor abrasion on my left wrist and at the base of my thumb as I was grasping the steering wheel. The airbag's inflating in just twenty five milliseconds imparted a pretty good whacking there as it smacked into my hand. That's it, however. What caused that airbag's deployment was my truck's impacting the "Mansfield Bar" of the semi-trailer ahead of me. The driver of that truck had to stop short abruptly as he was cut off by a car suddenly running in front of him. The driver of that car wanted to get into a parking lot to the right of our vehicles and didn't want to bother waiting behind us to do so. This took place at the intersection of South Central Ave and Artesia in Compton. It was a cold and rainy day so the road was oily slick which definitely didn't help with stopping traction as I jammed on my brakes. That big vertical crease in the front center of my truck's hood was from the right pillar of that safety bar. The pillar's left bar is what took out my left headlight and did the rest of the damage. 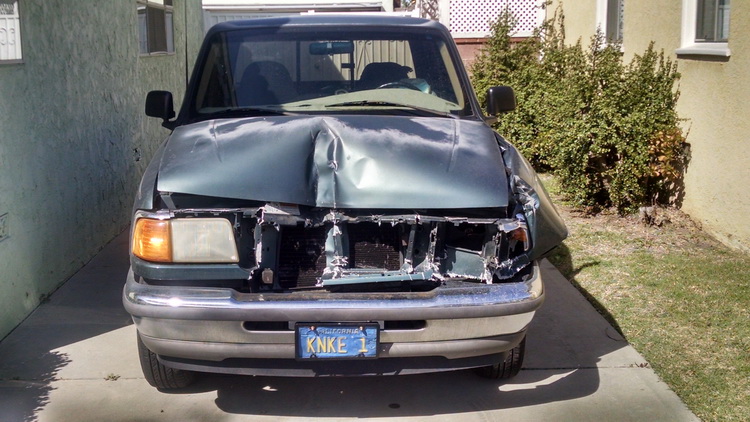 I had my truck towed back to my house in Lakewood and put up into my driveway there. It was a sunny day on that following Monday so I got some pictures of the damage done. The front of my Ranger is well and truly staved in. 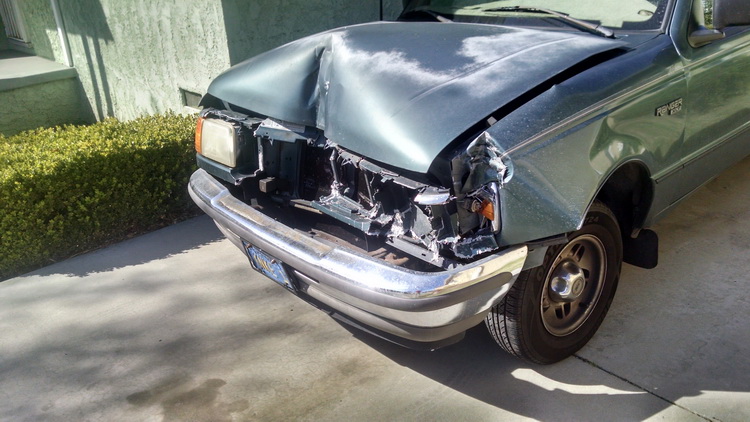 The left front side took most of the impact and wound up crushed and crumpled as a result.  In this image you can see how the left front quarter panel impacted the driver's side door. The door doesn't really close now without being hefted into place. The frame is that torqued. 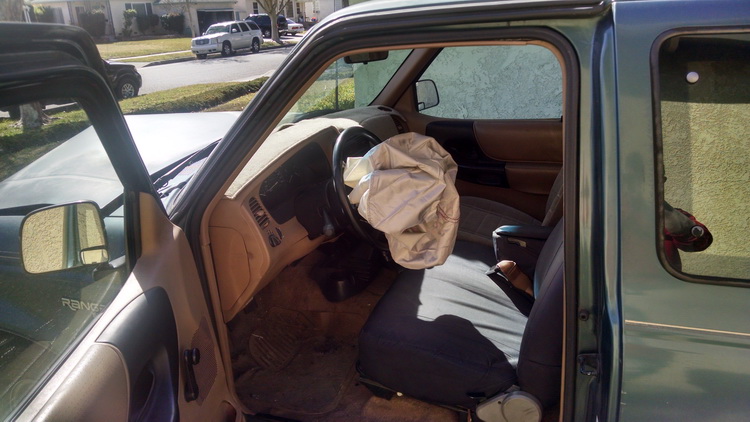 And here's the inside of my trusty Ranger. That airbag's deployment was a very unexpected thing. Startling, in fact. It's happening left no doubt as to how total the collision was. And it meant clearly that my truck was no longer usable. This, even without getting out of it and seeing the extent of the damage to its front end. That was a very depressing thing at that moment. Even after twenty years of use and having put over a quarter million miles on it - 283,358 total with 258,223 being the miles I'd put on it myself - the truck still ran fine. The paint was fading, the clearcoat on the roof and hood was oxidized away but other than that, it was still a very serviceable vehicle. I had plans to replace it but not immediately. Perhaps in the coming year or two. Not now however. On Friday morning, March 9th, at just past 09:00 the tow truck from the salvage company finally showed up. It took just a couple of minutes and the driver had my truck hooked up and on the flatbed. 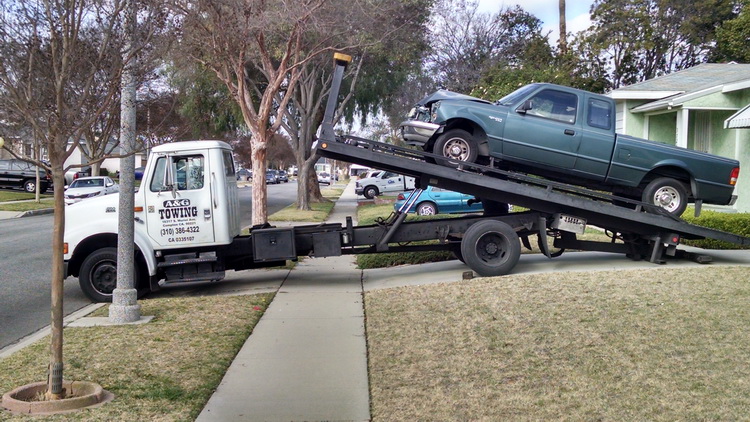 A minute or two later he had finished securing my truck to that flatbed and with nothing else left to do, he drove off. I stood out in the middle of the street and took this one last image of my truck as it was taken away for good. 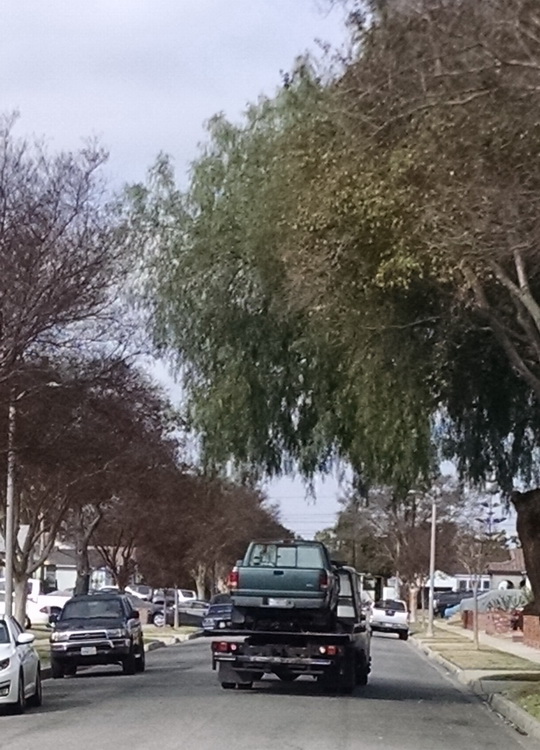 This truck is but the second vehicle I've owned in my life to date. It was the one which I drove off to Aurora in and had loaded to its gills coming back. It's the vehicle I moved my life up from San Diego to Los Angeles in. I had a lot of history with this vehicle - twenty years will tend to do that. And that's the Road's End for my Truck and its tales... |
If you would like to learn more about
me – just ask! Drop me a line and we’ll see what
happens. I can be reached
here at: madoc@madoc.us.
Page Last Updated On: 14 August 2022
